


Kids are visual creatures. They like to be entertained in every respect. As a child, I loved books with illustrations. When I morphed into reading chapter books as a young person I wanted the more complex stories, but I still wanted the imagery. I can remember really appreciating the authors who put ink illustrations in their chapter books. I have fond memories of poring over the minute squiggles and flourishes on the pages of Tove Jansson’s books.

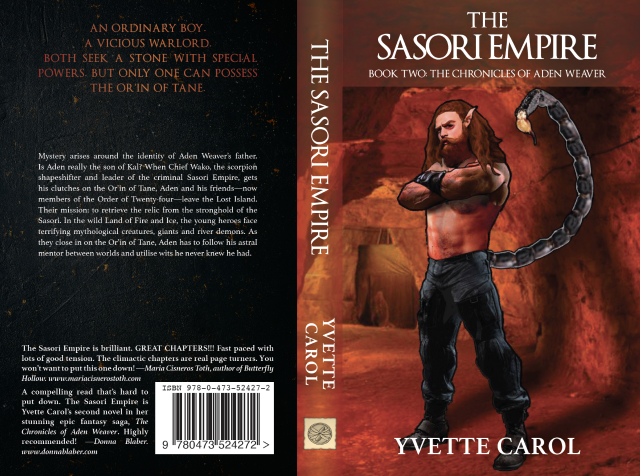
Last year, I prepared to release my first book, my novel, ‘The Or’in of Tane Mahuta.’ The first book from The Chronicles of Aden Weaver. I realized there was no way the budget would stretch to illustrations, so I came up with an easy solution.
Here’s a guide to creating your own pen and ink book illustrations:
Step One: Start with your characters.
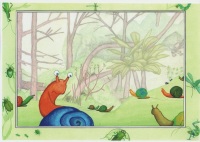
First, you must have some form of cover art for your book which you have either paid for or otherwise have liberty to use. For my debut novel, I had the two main characters rendered artistically in digital form by my nephew.
I simply copied the character with a pencil.

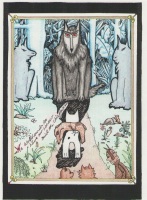
 I wanted to introduce a new face. I took a photo of a statue of a giant which I found in a 1970’s magazine and copied the basic outline.
*Hot Tip: I use an automatic pencil, as they have the super fine leads. You want to do all the early stages on tracing paper.

I already had my protagonist, Aden Weaver, rendered in pencil from last year, but I needed to change his position for this book so I lifted him into the air. This gave me a new image to work with. As I pinned down the character’s positions, I switched from pencil to a fine permanent marker pen.
*Hot Tip: You’ll need to see every line. A fine nib is necessary. I use a Staedtler “Triplus fineliner.” Every line needs to be carefully but clearly distinct.

Step Two: Create the background and foreground
For this image, I decided to use one of a few special backdrops. A dear friend, Lyall Gardiner, had gifted me four of his ink/colour pencil backdrops before he passed. In A3, they’re enormous, so I selected elements from one image, the moon and wispy clouds and some of the looming shapes and traced them onto a more compacted A4 page.
You could use whatever you have to hand, interesting segments of your kids’ artwork, pieces of your own from childhood, or you could go wild and cut segments of out-of-date magazine pictures to create a montage/mosaic effect, etc. Use your imagination.

*Hot Tip: Take care not to tread on rights to intellectual property.

Step Three: Combine and Trace
The next part is to employ your artistic eye with placement. Arrange your characters on the background in a way that fits the “story” you want to tell. The great thing about using tracing paper is you can flip the characters over. I decided to “tell the story” of the Oni looming. However, I needed to flip our hero to have him face the giant. To do this, I simply turned the paper over and re-defined all the lines with pen on the reverse of the paper!

Step Four: Fill it in!
I took my taped-together tracing paper image and copied it onto thick art paper. I used permanent markers and filled in the picture. I thought in terms of light and shadow, silhouette, of how things look in the dark, not drawing to be realistic but to create pattern – effect through contrast. I left certain patches: one or two to be left white and at least a few to be painted black. They added impact.

The resulting image will be one of the two illustration plates for inside ‘The Sasori Empire.’ On Facebook, I shared it with the caption, ‘The horned face of the Oni appeared in the trunk, even more hideous than before, and a head of bark grew.’
Step Five: Copyright!
Make sure to add your name the copyright symbol and the year somewhere on your picture.
With a bit of effort, anyone can create at least a couple of illustrations to go inside their own book. These simple pen and inks are relatively easy, quick, and they’re super fun to do. You have the satisfaction of having made it yourself.
Have you ever tried your hand at your own illustrations?

Talk to you later
Keep on Creating!
Yvette K. Carol
+
The Holy Grail is to spend less time making the picture than it takes people to look at it. ~ Banksy
+
Subscribe to my Newsletter by emailing me with “Newsletter Subscription” in the subject line to: yvettecarol@hotmail.com


An excellent tutorial Yvette 👍😃❤
LikeLiked by 1 person
Thanks, Chris! 🙂
LikeLiked by 1 person
I wish I could draw, but not part of my skill set. ;-/
Anna from elements of emaginette
LikeLiked by 1 person
Hi, Anna,
thanks for stopping by!
Your genre is for adults, am I right in thinking that? At any rate, I think illustrations are not expected beyond the upper middle grade age bracket.
I personally love pen and ink. I wish I could sit and illustrate a lot more. But, I’ve been down that bunny-hole before. It’s that mysterious place, like a black hole in my universe, that sucks every spare minute down into it without remorse! Ha ha 🙂 Must. Focus. On. The. Writing!
LikeLiked by 1 person
You made a good job of that artwork, Yvette. I’m impressed by the way you cleverly combined elements to come up with something suitable to illustrate your story.
LikeLiked by 1 person
Aw, thanks, Bun. I wasn’t sure if this sort of drawing wouldn’t be considered old-fashioned. But, it was what I was doing and I thought somebody else might be interested. 🙂
LikeLiked by 1 person
Brilliant idea, Yvette. I’m bookmarking this for my children’s book I hope to write one day soon.
LikeLiked by 1 person
Cool!! That’s great to hear, Joylene. If you need any other advice re your future children’s book, let me know, I’d be happy to help. One other thing, when it comes to making your own illustrations to be sent to the printer/book publisher or whatever, make sure you scan each image to “600 dpi.” This will give you the highest resolution possible. Good luck! 🙂
LikeLike